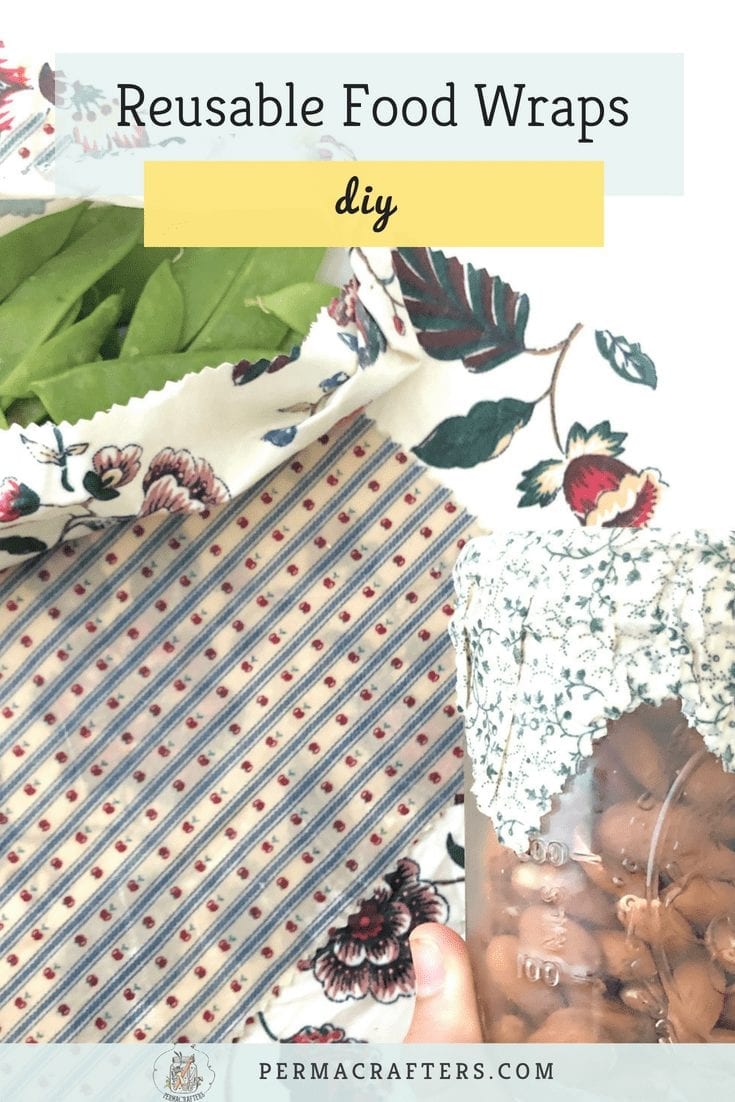
How To Make Your Own Reusable Food Wraps
Ready to ditch disposable plastic wraps and switch to eco-friendly beeswax wraps? Here’s how to make your own reusable food wraps in a few easy steps!
My Peruvian friend Silvana came to visit me in North Carolina recently. She brilliantly suggested making our own reusable food wraps during her stay. I wouldn’t run a business called Permacrafters if I didn’t love sustainable crafts, so I of course jumped on the opportunity! Her visit turned into an all-out Permacrafters summer camp: getting our hands dirty at the Eco-Institute gardening coop, thrifting for secondhand goodies at The Scrap Exchange, and of course, enjoying lots of DIY projects like making wool dryer balls and these beeswax wraps.
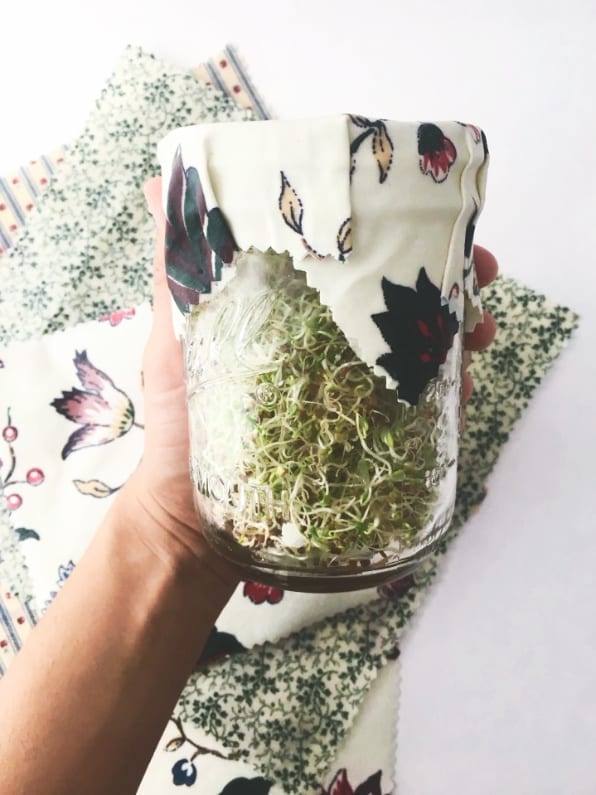
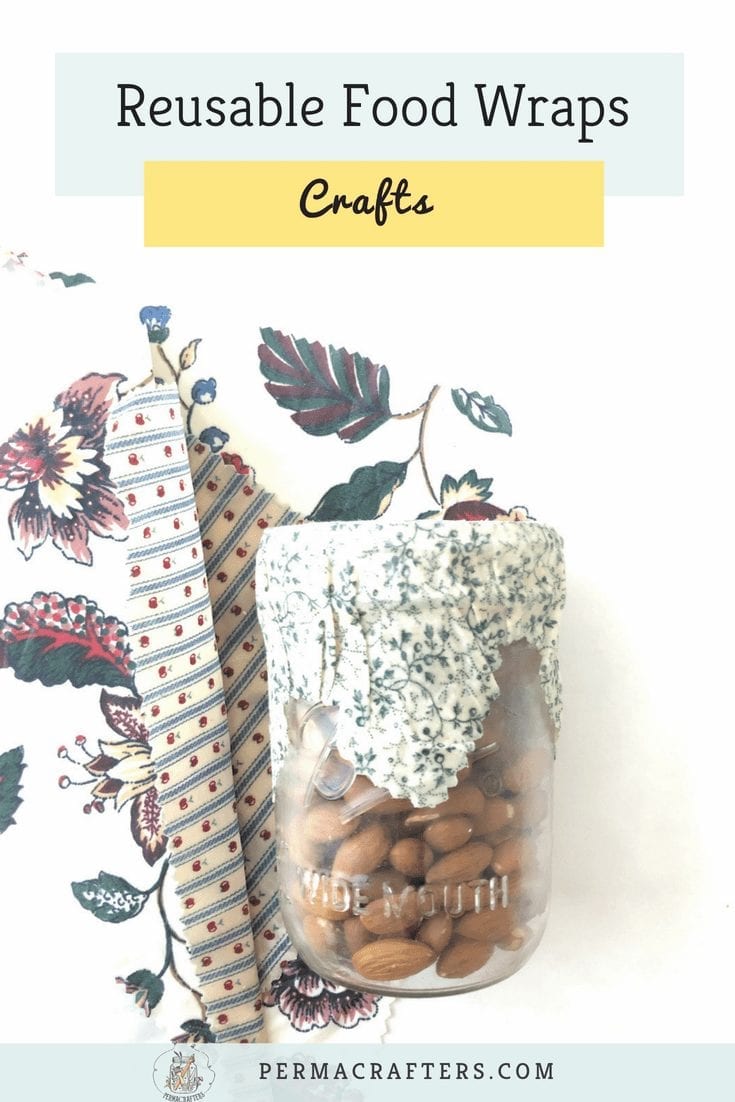
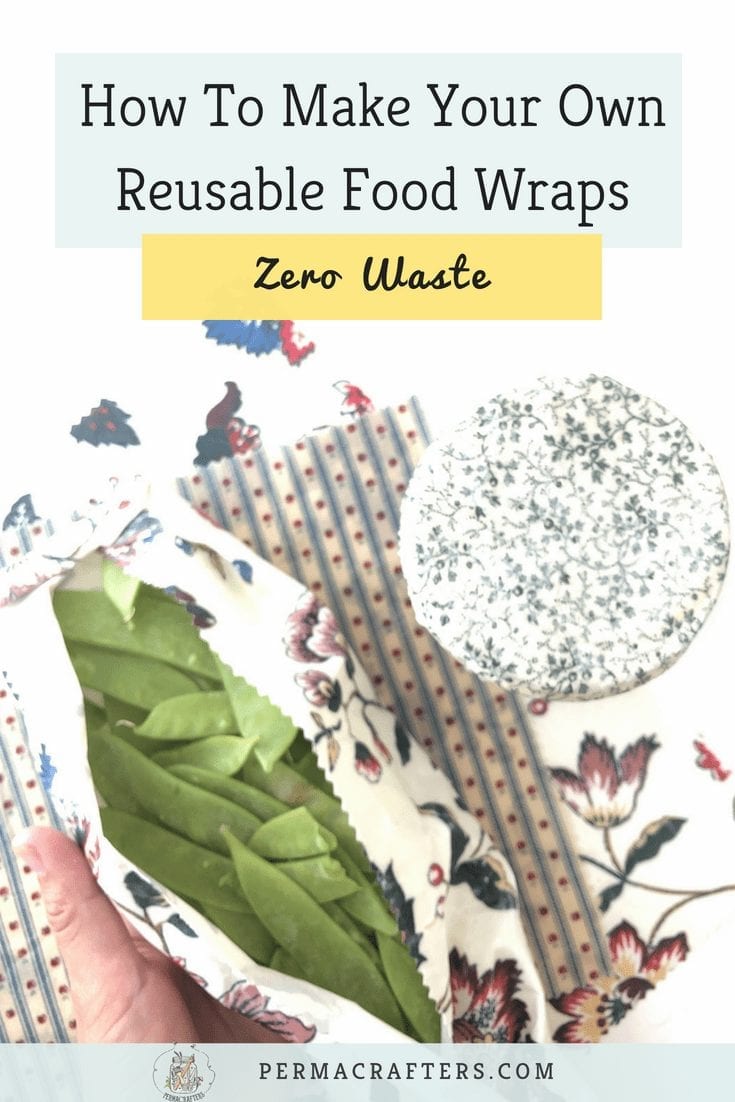
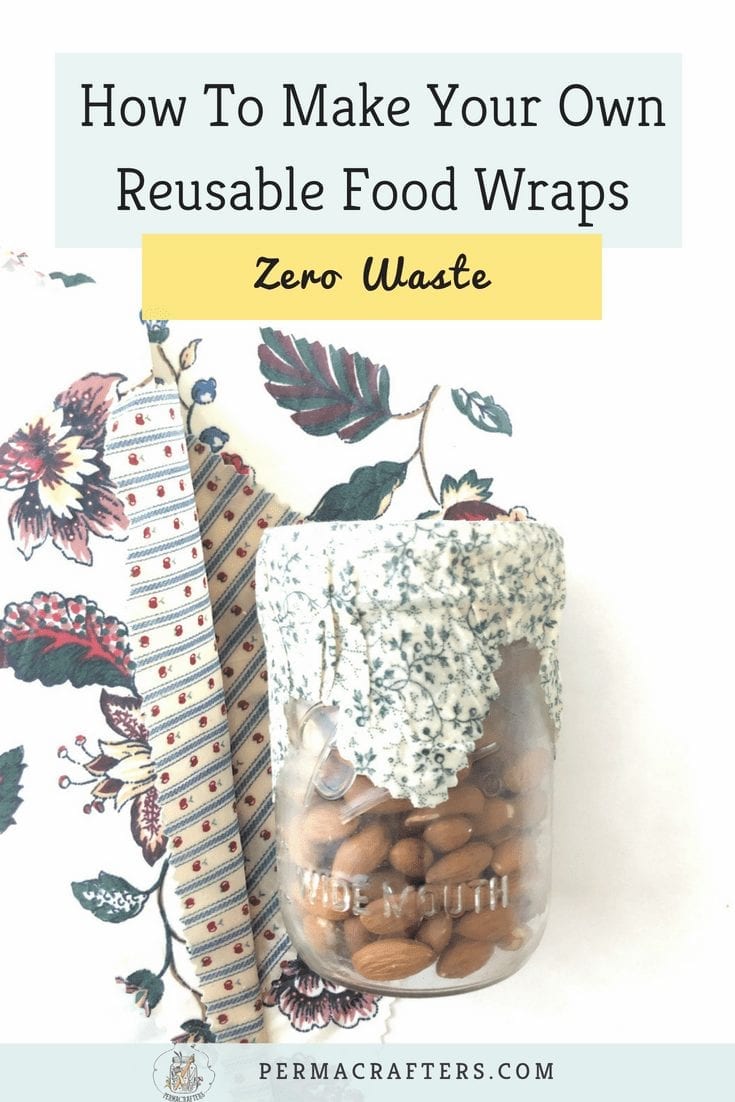
Unlike plastic wrap, these beeswax wraps are reusable and depending on the fabric you use, compostable too. A huge added benefit is that they don’t come with a slew of health concerns. Luckily, nowadays, plastic wraps in the United States no longer contain Polyvinylidene Chloride, or PVC, which contains endocrine-disrupting phthalates. However, some may still contain diethylhexyl adipate (DEHA), which can leach into your food. That’s not a good thing since DEHA has been found to be toxic to organs, raises concern in terms of hormone disruption, and is toxic to wildlife. In addition, these single-use plastic wraps cannot be recycled, ultimately leading to further environmental pollution. I realized that it made a lot of sense to skip the health hazard and switch to eco-friendly beeswax wraps, which are free from toxic chemicals and won’t end up in my trashcan.
Other than having a ton of fun making these wraps from scratch, it also gave us the opportunity to support our favorite local business. The colorful cotton fabric used for our reusable food wraps was salvaged from The Scrap Exchange, a one-of-a-kind secondhand store in Durham that is perfect for scrap-lovers. So, if you love DIY projects and have a bit of time on your hands, this craft can be a cheaper alternative to store-bought beeswax wraps.
There are two methods to making DIY wraps. Both work great, but let’s start with the simpler method:
METHOD 1: Beeswax & Oven
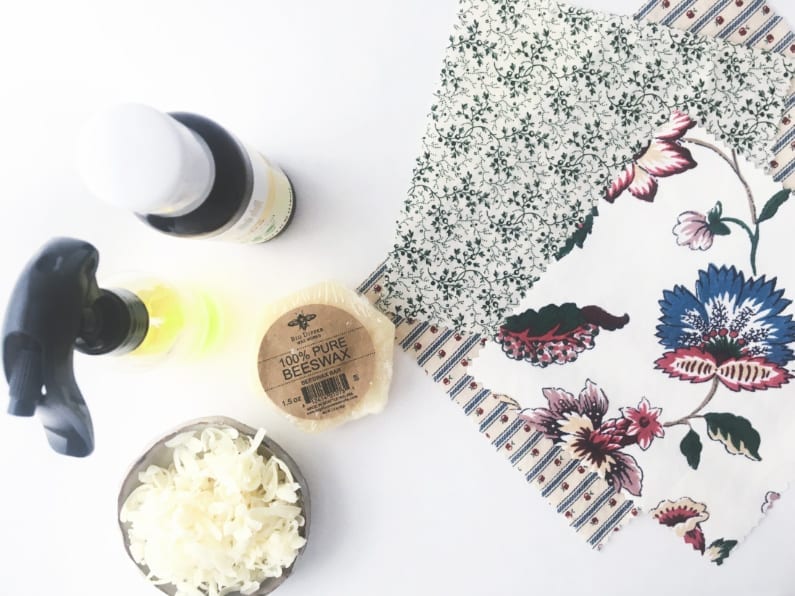
Materials:
- Beeswax from abandoned hives (get from My Wild Muse), grated
- 100% cotton absorbent and soft fabric (kitchen towel)
- Scissors
- Brush
- Ruler or bowl
- Metallic gripper
Instructions:
- Pre-heat the oven to 200 F (90C).
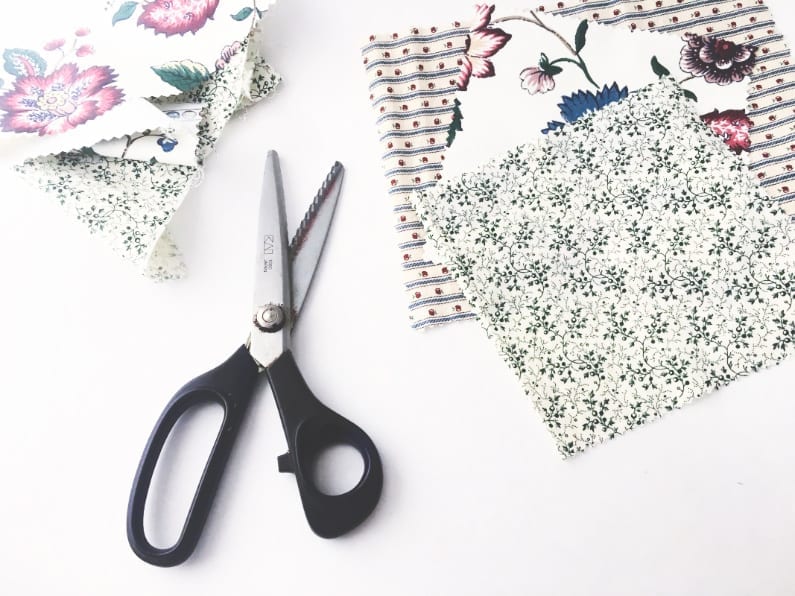
- Cut your fabric into the sizes you want.
- Place the piece of fabric on a baking tray.
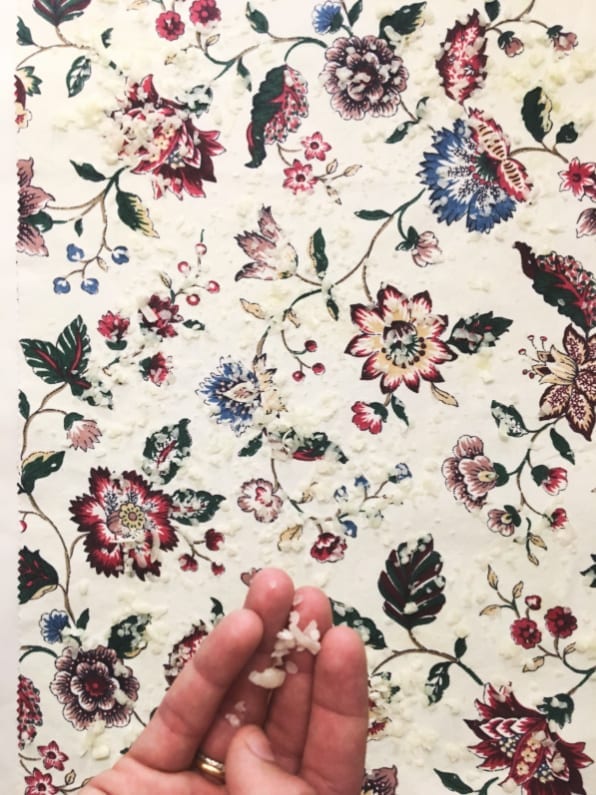
- Generously cover the piece of fabric with grated beeswax. (You also can use bigger pieces of beeswax, but you need watch them carefully to spread te wax evenly.)
- Turn your oven light on and keep an eye on the melting beeswax.
- Once melted, spread the beeswax with your brush. If necessary, add more beeswax and re-brush.
- No need to repeat the process for the other side: the fabric will absorb the beeswax.
- Using your gripper, wave the fabric around to dry and set it aside to harden on a drying rack.
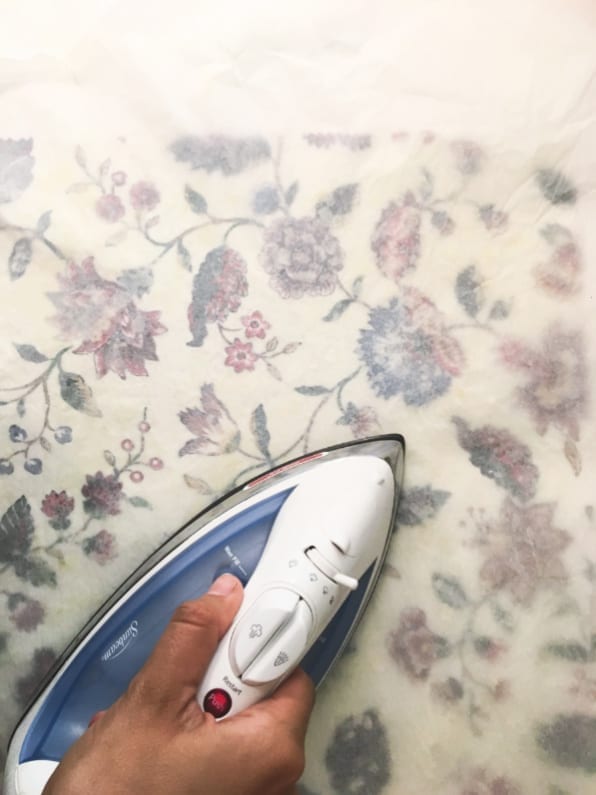
METHOD 2: Beeswax, Jojoba Oil, Iron
Materials:
- 1 cup of beeswax, grated or pastilles (try to find a local source, I used beeswax that had been gifted to me a while back)
- About ¼ cup Jojoba oil (fill a spray bottle with the oil)
- 100% cotton fabric to ensure the beeswax sticks. Get enough to make about 6 wraps. (We thrifted ours from The Scrap Exchange).
- Parchment paper (unfortunately my reusable baking sheets wouldn’t transmit enough heat)
- Iron
- Zig Zag Sewing Scissors (to ensure the fabric doesn’t come apart.)
- Ruler
- Fabric Marker
Instructions:
- Using the Zig Zag Sewing Scissors, cut your fabric into the sizes you want. We went with three 6″ x 6″ square, three 9″ x 9″ squares and a couple 13″ x 13″ squares. Use the fabric marker and ruler to help you. Make sure to make as many beeswax wraps as you will need so you won’t find yourself in a pinch.
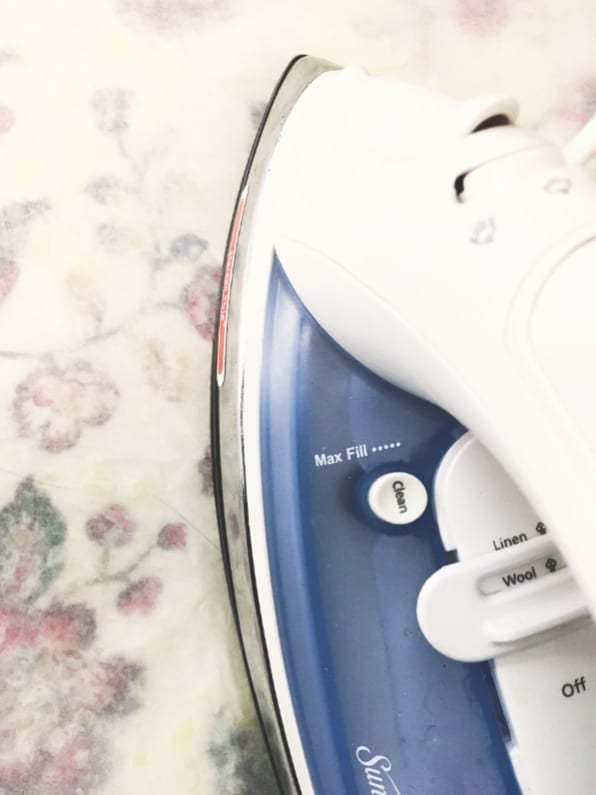
- Place a piece of parchment paper flat on a table – it must be bigger than the size of your fabric. Lay your fabric down and sprinkle it with beeswax (about 2 tbps. for every piece of fabric). Spray 2 to 3 times with jojoba oil. Set the second parchment paper on top and iron the fabric (ironing on the wool setting). The mix of beeswax and jojoba oil will spread evenly on the fabric.
- Once all the wax has melted, lift the top parchment paper up and let the wax harden for few seconds. Make sure that all edges and corners have been covered.
- Repeat the same process for the other side of the fabric. Set aside to harden, on a drying rack, for instance. Repeat these steps until you have as many wraps as you need.
As with plastic wrap, these beeswax wraps should not be microwaved. Keep in mind that you’ll eventually have to re-wax your pieces of fabric, but they will stay in good shape for quite some time. My only complaint about these wraps is that they aren’t quite as flexible as plastic wrap and not perfect for every food item.
Do you love these reusable food wraps?! Will you be giving this DIY project a try? If you are short on time, but still want to make a zero waste switch, we encourage you to purchase beeswax wraps from Super Bee or Abeego.
Instructions:
- Using the Zig Zag Sewing Scissors, cut your fabric into the sizes you want. We went with three 6″ x 6″ square, three 9″ x 9″ squares and a couple 13″ x 13″ squares. Use the fabric marker and ruler to help you. Make sure to make as many beeswax wraps as you will need so you won’t find yourself in a pinch.
- Place a piece of parchment paper flat on a table – it must be bigger than the size of your fabric. Lay your fabric down and sprinkle it with beeswax (about 2 tbps. for every piece of fabric). Spray 2 to 3 times with jojoba oil. Set the second parchment paper on top and iron the fabric (ironing on the wool setting). The mix of beeswax and jojoba oil will spread evenly on the fabric.
- Once all the wax has melted, lift the top parchment paper up and let the wax harden for few seconds. Make sure that all edges and corners have been covered.
- Repeat the same process for the other side of the fabric. Set aside to harden, on a drying rack, for instance. Repeat these steps until you have as many wraps as you need.
As with plastic wrap, these beeswax wraps should not be microwaved. Keep in mind that you’ll eventually have to re-wax your pieces of fabric, but they will stay in good shape for quite some time. My only complaint about these wraps is that they aren’t quite as flexible as plastic wrap and not perfect for every food item.
Do you love these reusable food wraps?! Will you be giving this DIY project a try? If you are short on time, but still want to make a zero waste switch, we encourage you to purchase beeswax wraps from Super Bee or Abeego.
You can learn more about reducing your waste in our free online video class: Intro to Zero Waste Living.
Happy crafting, everyone!
Hugs,
Cristina
About us

Get all our FREE booklets & online video courses.

Join over 9,000 students who have signed up for this amazing content to work towards a more sustainable lifestyle that respects Mama Earth.
By commenting you accept our Privacy Policy.

Cool! I’ve wanted to try these. A few curious questions:
1) where can I source some beeswax locally here in the triangle?
2) how do the zig zag scissors help to keep the fabric from coming apart? That is so interesting.
3) Do you know any alternative to the zig zag scissors? I don’t own them and don’t think I’d use them again.
4) Jojoba oil — where do you recommend sourcing this from and what other uses would it have in my home?
Thanks in advance!
Hi Rebecca! Sorry, somehow I missed this comment! 🙁 I’m so sorry to get back to you so late.
1) Local Triangle beeswax: I actually used leftovers of Christelle’s beeswax that she left me before leaving for Switzerland. For local beeswax, I would ask the OCBA (Orange County Beekeepers Association) or ask farmers selling honey at your local farmer’s market.
2) Zig zag scissors: The scissors are a gift from my mother in law, and they were actually from her mom, so it’s like a family relic. Generally using zig zag scissors will help to keep the fabric from fraying, but you could get away with not using them (or cutting in a zig zag pattern yourself). The beeswax alone may be enough to keep the fabric together.
4) Jojoba oil: You could use coconut or almond oil too, although I’ve only tried it with jojoba oil as that is what I had at home. Let us know if you try it with another oil! 🙂
Excited to see your beeswax wraps! Cristina
How to clean?
Hi Diane,
Always rinse the wraps with cold water. If needed, use natural dish soap and a soft brush to clean. 🙂